Cookie Texture Simulator
The Essential Cookie Toolkit
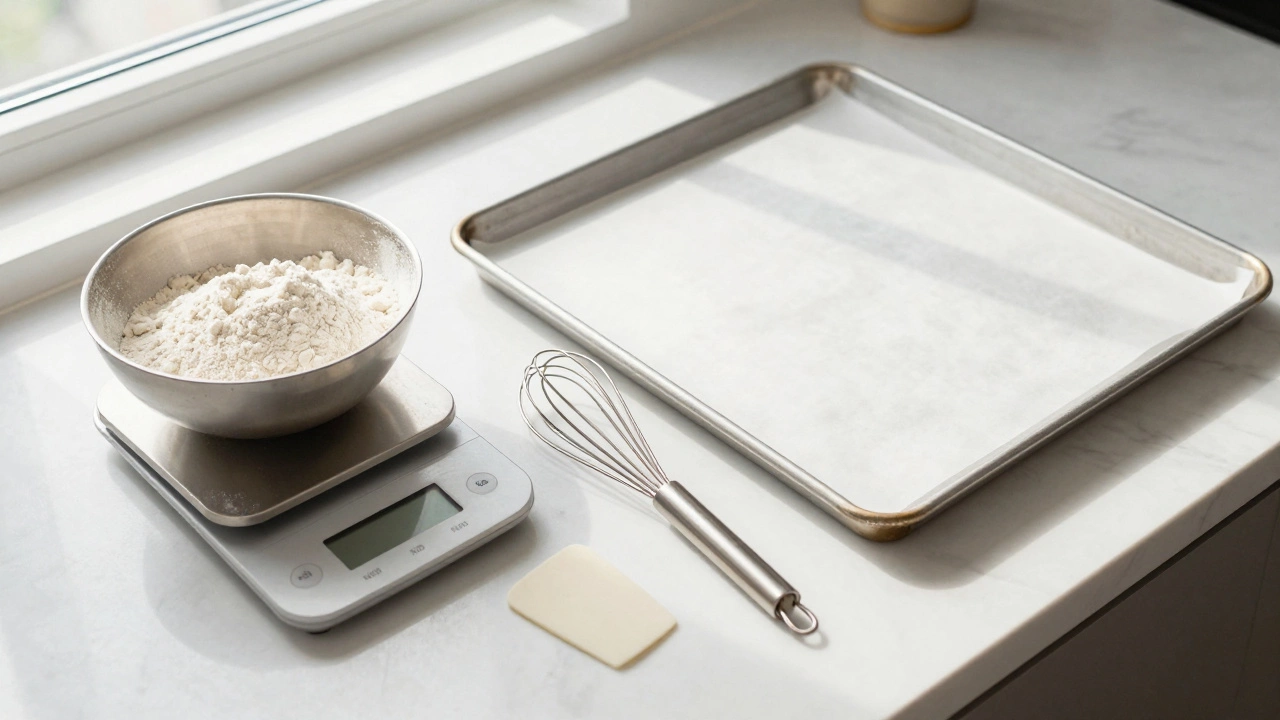
Before you even touch the flour, you need the right gear. You don't need a professional kitchen, but a few specific tools make the difference between a disaster and a delicious treat. Using a measuring cup for flour, for example, often leads to packing the flour down, which adds too much to the bowl and results in dry, crumbly cookies. Instead, use a digital scale or the "spoon and level" method.A Baking Sheet is your foundation. Heavy-gauge aluminum sheets distribute heat more evenly than thin ones. If you use a thin pan, the bottoms of your cookies might burn before the centers are cooked. Pair this with Parchment Paper or a silicone mat. This doesn't just stop sticking; it prevents the sugar from caramelizing too quickly against the metal, giving you a more consistent brown color.
Don't forget a sturdy whisk and a rubber spatula. The spatula is crucial for "folding" in ingredients like chocolate chips without knocking the air out of your butter and sugar mixture. If you overwork the dough, you develop too much gluten, and your cookies will be tough instead of tender.
Breaking Down the Ingredients
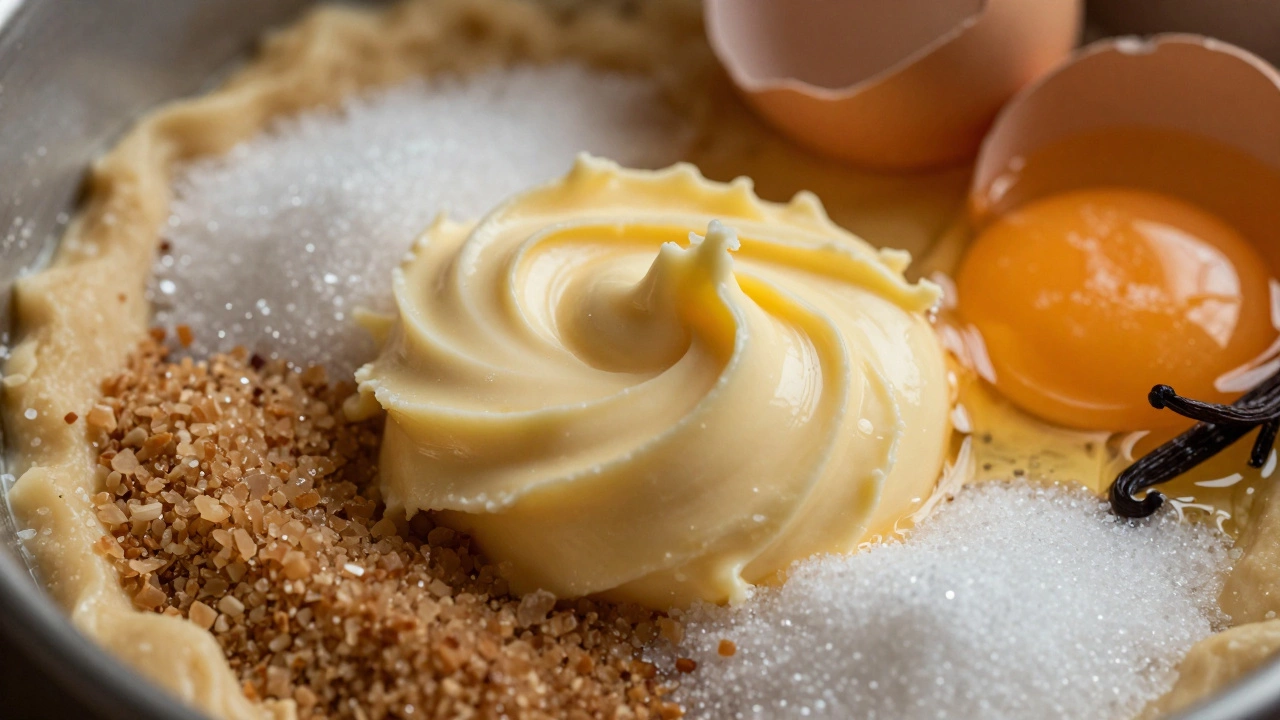
To simplify cookies, you have to see ingredients not just as food, but as tools. Each one does a specific job. If you swap one out or change the amount, the structure of the cookie changes.The Butter provides the fat. It's what makes the cookie rich and helps it spread. Cold butter creates a thicker, more mound-like cookie because it takes longer to melt in the oven. Room temperature (softened) butter creates a more classic, spread-out shape. If you brown your butter first, you add a nutty, toasted flavor that completely transforms a basic sugar cookie into something gourmet.
Sugar isn't just for sweetness. Granulated Sugar (white sugar) helps cookies spread and gives them a crisp edge. Brown Sugar, which contains molasses, adds moisture and a chewy, caramel-like texture. This is why a recipe that uses both usually gives you a cookie with a crisp edge and a soft center.
Then we have the binders. Eggs provide structure and moisture. The fat in the yolk adds richness, while the protein in the white helps the cookie hold its shape. Finally, All-Purpose Flour is the backbone. It provides the starch and protein that hold everything together.
| Ingredient | More of This... | Less of This... |
|---|---|---|
| Butter | More spread, richer taste | Tighter shape, drier texture |
| Brown Sugar | Chewier, moister, darker | Crispier, lighter color |
| Flour | Taller, cakier, less spread | Flatter, thinner, more buttery |
| Egg | Softer, more cake-like | Crispier, more brittle |
The Magic of Leavening
Ever wonder why some cookies are puffy and others are flat? That's the work of leavening agents. These are the ingredients that create tiny bubbles of air, making the cookie rise.Baking Soda is the most common. It needs an acid (like brown sugar or cocoa powder) to react. When it hits the heat, it creates carbon dioxide, which makes the cookie spread and brown. If you use too much, you'll get a metallic, soapy taste.
Baking Powder is different. It contains its own acid, so it reacts just by being mixed with liquid and heated. It generally produces a puffier, more "cakey" lift rather than a flat spread. Most home bakers use a mix of both to get a balance of height and spread.
Step-by-Step: The Simplified Baking Process
Now that we know the "why," let's look at the "how." Follow these steps to ensure every batch is a success.- Cream the Fats and Sugars: Beat your softened butter and sugars together until the mixture looks pale and fluffy. This isn't just about mixing; it's about whipping air into the butter. That air creates the structure that keeps the cookie from becoming a hard disk.
- Add Wet Ingredients: Mix in your eggs and vanilla extract. Be sure your eggs are at room temperature so they don't curdle the butter.
- Mix Dry Ingredients Separately: In a different bowl, whisk your flour, salt, and leavening agents. This ensures the baking soda is evenly distributed so you don't end up with one cookie that tastes like soap and another that's flat.
- Combine Slowly: Pour the dry ingredients into the wet. Stop mixing the second you don't see any more streaks of flour. Over-mixing develops gluten, which makes cookies tough.
- The Secret Weapon: Chilling: Put your dough in the fridge for at least 2 hours, or ideally 24 hours. Chilling solidifies the fat, so the cookies don't melt too fast in the oven. It also allows the flour to fully hydrate, which results in a deeper flavor and better texture.
- Bake and Cool: Bake until the edges are golden but the centers still look slightly underdone. They will finish cooking on the hot pan after you take them out.
Common Mistakes and How to Fix Them
Even pros mess up. The key is knowing how to pivot. If your cookies are spreading too much, your butter might have been too soft, or your oven temperature is too low. Try chilling the dough longer next time or increasing the oven heat by 15 degrees.If your cookies are too puffy or "cakey," you might have used too much flour or too much baking powder. To fix this, try measuring your flour by weight (grams) instead of volume. A cup of flour can vary by as much as 20 grams depending on how you scoop it, which is enough to ruin a batch.
Burnt bottoms are usually caused by dark-colored baking sheets that absorb more heat. Switching to a light-colored pan or using a double layer of parchment paper can create a buffer that saves your cookies from the same fate as a burnt piece of toast.
Customizing Your Batch
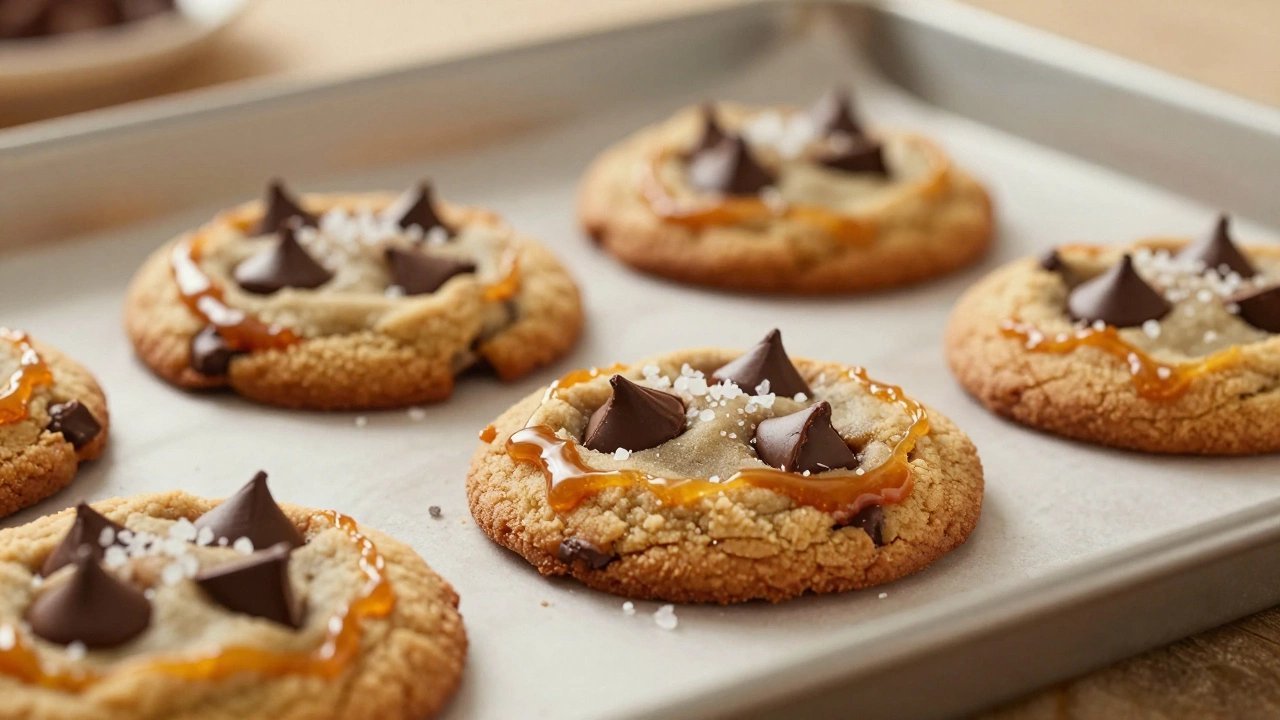
Once you've mastered the basic dough, you can start experimenting. The beauty of a simplified base is that it's a canvas. Want a Chocolate Chip Cookie? Fold in semi-sweet chocolate chips and a pinch of sea salt on top. Want something more sophisticated? Swap the vanilla for almond extract and add orange zest.If you want a crispier cookie, increase the white sugar and decrease the brown sugar. If you want something that tastes like a bakery-style "levain" cookie, use cold butter and a higher ratio of flour. Don't be afraid to play with the temperature; baking at 325°F (160°C) will give you a more uniform, pale cookie, while 375°F (190°C) will give you those highly prized caramelized, crispy edges.
Why are my cookies flat?
Flat cookies usually happen for three reasons: the butter was too warm when you started, the dough wasn't chilled, or you didn't use enough flour. Ensure your butter is "cool room temperature" and always chill your dough for at least two hours before baking.
Can I use margarine instead of butter?
Yes, you can, but the flavor and texture will change. Margarine has a different melting point and fat content, which often results in a softer, more oily cookie that may spread more than a traditional butter-based cookie.
What is the difference between baking soda and baking powder?
Baking soda needs an acid (like brown sugar or lemon juice) to activate and creates a flatter, browner cookie. Baking powder contains its own acid and creates a puffier, more cake-like lift. Many recipes use both to get the perfect balance of texture.
How do I stop cookies from sticking to the pan?
The best way is to use parchment paper or a silicone baking mat. Grease and flouring the pan works, but it can leave a residue on the bottom of the cookie and doesn't provide as consistent a result as parchment.
Why do I need to chill the cookie dough?
Chilling does two things: it prevents the fat from melting too quickly in the oven (which stops the cookies from spreading into one big pancake) and it allows the flavors to concentrate, making the cookies taste richer.
Popular Posts

The Most Expensive Birthday Cake in the U.S.
Feb, 14 2025

Perfectly Portioning Macarons for Gatherings
Jan, 20 2025

The Journey of Macarons to Brazil: A Sweet Odyssey
Oct, 24 2024