Fudge Making: Tips, Tricks, and Recipes
If you love that rich, melt‑in‑your‑mouth texture, you’re in the right place. Fudge can seem tricky, but the basics are simple once you know what to watch for. Below you’ll find the most useful advice, from temperature tricks to fixing common mistakes, all written in plain language.
Get the Temperature Right
The single biggest factor in smooth fudge is hitting the soft‑ball stage, which sits between 235°F and 240°F (112°C‑115°C). A candy thermometer is the easiest way to be sure you’re in the zone. If you don’t have one, watch for the “ball drop” test: dip a spoon into the syrup, let a small drop fall into cold water, and roll it between your fingers. It should form a soft, pliable ball. Altitude matters too—add a few extra degrees for higher elevations.
When the temperature drops just a few seconds below the range, the sugar crystals stay small and the fudge stays creamy. Boil too long and the sugar will harden, giving you a crumbly or rock‑hard batch. If you ever overshoot, adding a splash of milk and reheating gently can sometimes rescue the texture, but it’s best to aim for the right stage the first time.
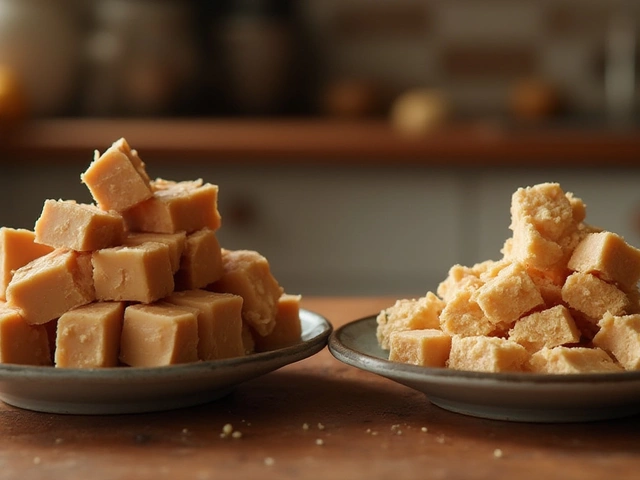
Prevent Grainy or Crumbly Fudge
Grainy fudge usually means the sugar crystals re‑formed after you removed the pan from heat. Stirring too early or too vigorously can cause this. The trick is to let the mixture sit undisturbed for a minute or two, then give it a gentle, slow stir until it thickens. Once it looks glossy and smooth, beat it briskly with a wooden spoon until it loses its shine. That’s when you know it’s ready to pour into the lined pan.
If you end up with grainy fudge, you can often fix it by reheating to the soft‑ball stage, adding a teaspoon of corn syrup, and stirring gently. The corn syrup helps keep crystals from forming again. Another quick fix is to blend the finished fudge in a food processor for a few seconds—this breaks up larger crystals and gives a smoother bite.
Storing fudge correctly also keeps it from getting dry. Wrap the bars tightly in wax paper, then a layer of foil, and keep them in a cool, dry place. A short stint in the fridge is fine, but long‑term freezer storage works best if you want to make a big batch ahead of a party.
Now that you know the key points—temperature, gentle stirring, and proper storage—you can experiment with flavors. Classic chocolate, peanut butter, coffee, or even salted caramel all use the same base technique. Just add your flavorings after you’ve removed the pan from heat, then give the mixture a quick stir before it thickens.
Ready to try it yourself? Grab a pot, a candy thermometer, and your favorite chocolate chips. Follow the steps above, stay patient, and you’ll have smooth, creamy fudge to share with friends or stash for later. Happy cooking!

What Not to Do When Making Fudge
Making fudge can seem simple, but even small mistakes can ruin the batch. Dive into the common pitfalls of fudge-making, and learn how to avoid grainy texture, burning chocolate, and more. Whether you're a beginner or seasoned pro, this guide offers practical advice and insights to help you achieve velvety, mouthwatering fudge every time.
View MorePopular Posts


How Many Macarons Fit in a Five-Tier Tower?
Dec, 14 2024

Freezing Cream Cheese: What Happens Next?
Mar, 7 2025