Ever bitten into a cookie that was just the right amount of chewy? It’s like discovering gold in the cookie world. There's more science than magic behind achieving that perfect chewy texture, and I'm here to spill all the cookie secrets.
Let's talk flour - the foundation of our cookies. The type and even the amount of flour you use can be a game-changer. All-purpose flour is the go-to, but measuring it accurately is a must. Too much and your cookies puff up like little cakes; too little, and they're more like a pancake situation.
Then there's sugar. You might not realize it, but brown sugar is your chewy cookie hero. It has more moisture than granulated sugar, thanks to the molasses, and this keeps the cookies soft and chewy long after they've cooled. Don't skip it! And if you've got some good-quality vanilla extract lying around, a splash of that never hurts.
So go ahead and set your oven to glove-friendly, we're about to bake the chewiest cookies that are sure to make Whiskers, my cat, peek over the kitchen counter out of curiosity. Just remember, consistency and a bit of insight into your ingredients are your best pals in this adventure.
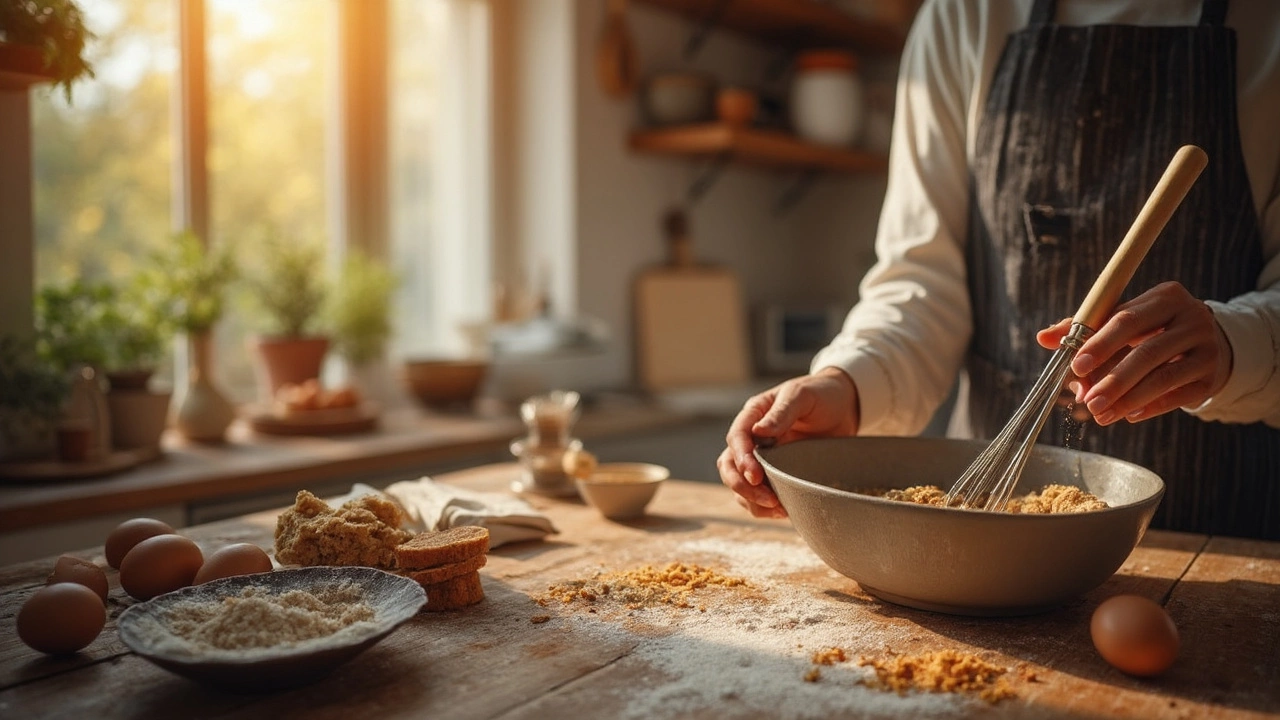
Ingredients Matter
When it comes to achieving that perfectly chewy cookie texture, ingredients play a crucial role. Each component of your cookie contributes to its final chewiness, so it's vital to understand how these ingredients work together.
Flour is the backbone of any cookie recipe. Choosing all-purpose flour is generally the best bet for texture. But here's the trick: measure your flour accurately. A couple of extra tablespoons can turn a chewy cookie into a dense one. To avoid this, always spoon the flour into your measuring cup and level it off with a knife instead of scooping directly from the bag.
Then we have sugar, and not just any sugar, but brown sugar. The greater moisture content in brown sugar compared to white sugar is what keeps your cookies chewy and soft. It's all about the molasses in the brown sugar that makes this magic happen. Though not everyone knows this, using a mix of both brown and white sugar can also balance sweetness and moisture.
Switching gears to fats, butter is your best friend if you want homemade cookies with that classic chewy texture. Always opt for unsalted butter so you can control the saltiness of your dough. Melted butter can give you a chewier texture because it adds to the moisture content and helps make the cookies softer.
For added richness and chewiness, consider adding egg yolks. It might sound a bit out there, but egg yolks contribute to a dense and tender cookie. One whole egg is standard, but adding an extra yolk will ramp up the richness.
Lastly, vanilla extract might not be responsible for chewiness, but it is the secret behind the rich flavor of your cookies. Don't skip it if you want your cookies to have that unmistakable homemade aroma.
Each ingredient serves its purpose in working towards chewy cookie perfection. By understanding their roles, you're on your way to baking cookies that'll disappear from the plate before they've even cooled down.
Mixing Techniques
Alright, mixologists of the cookie world, this is where the magic truly begins. The way you handle your cookie dough can seriously tip the scales between soft, chewy goodness and, well, a crumbly disappointment. So, let's get into the nitty-gritty of mixing techniques for chewy cookies.
First, soften that butter! Cold, hard butter just won't mix right, leaving you with lumps instead of a smooth dough. Give it about 15 minutes on the counter before you start. Once softened, cream that butter with sugars like your life depends on it. The key here is to blend until the mixture is light and fluffy. Aim for a good 2-3 minutes of mixing.
The pros at Cook's Illustrated say,
"Creaming butter and sugar together properly incorporates air, creating a light texture."This step is non-negotiable in your quest for a perfectly chewy cookie.
Now, don’t rush the eggs. Add them one at a time, giving each one its moment in the spotlight to mix in completely. Patience here sets up the structure for your cookies.
Once the wet ingredients are well mixed, turn your attention to the dry ingredients. And here's a hot tip: mix your dry stuff - flour, baking soda, salt - in a separate bowl before they join the main dough party. This step ensures everything is distributed evenly for a consistent bake.
When it’s time to combine wet and dry, use your mixer on the lowest speed, or even better, ditch the gadget and mix by hand. Over-mixing can activate the gluten in the flour and make cookies tough rather than chewy.
If your dough seems a bit sticky, don’t freak out. Sticky dough often bakes into the chewiest of homemade cookies, so resist the urge to add more flour.
Here's a fun fact: some bakers like to chill the dough for about 30 minutes. This little trick can help the flavors meld, leading to much tastier cookies. Try it out if you can pause your cookie cravings that long!
In summary, handling dough with care and attention is like the secret handshake in a cookie recipe club. Follow these steps for that homemade joy only the perfect cookie can bring. Next up, how to nail baking and timing.
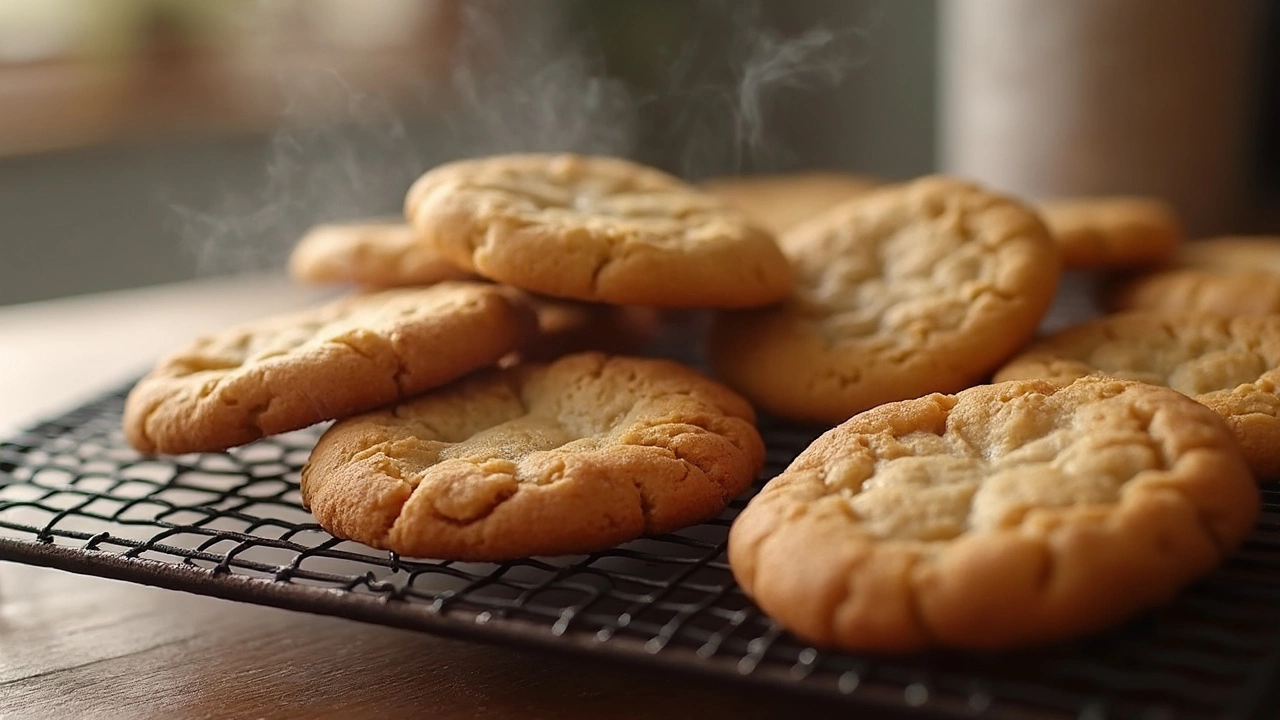
Baking and Timing
Alright, so you've got your dough all ready to go. Now, let's dive into the crucial part: baking and timing. This can seriously make or break your chewy cookies. Remember, it's not just about shoving them into a hot oven and hoping for the best.
The oven temperature is key. Typically, setting it at 350°F (175°C) hits the sweet spot for most cookies. It's hot enough to cook through without burning the edges, which keeps the inside chewy. Make sure your oven is preheated properly—an out-of-sync temperature can mess with your texture.
Now, onto the art of timing. Here's a trick: bake the cookies until the edges are lightly golden but the centers still look a bit underdone. They'll continue cooking on the sheet once you take them out. So, if a recipe says 'bake for 12 minutes,' start checking at around 10 minutes. It might sound weird, but a little underbaking is your ticket to chewy glory.
You might also want to consider baking one tray at a time for the best results. This helps maintain even heat and prevents opening the oven—which lets heat escape—unnecessarily. If you're in a rush and need to bake two trays, rotate them halfway through cooking. This helps them bake evenly, so no tray gets more love than the other.
Timing your cookies isn't just a guessing game; it's a science and a bit of a dance. But trust me, once you get the hang of it, your homemade cookies will always be chewy perfection.
Cooling and Storing
Baking those chewy cookies is just half the battle, right? The real game-changer is how you cool and store them. A lot of people underestimate this step, but trust me, it's crucial!
First things first, let your cookies cool on the baking sheet for about 5 minutes after you pull them from the oven. This little rest allows them to firm up a bit before you transfer them, which is key for maintaining that chewy texture. If you're too quick to move them, you risk ending up with a mangled cookie mess.
After that initial cool down, move them to a wire rack to let the air circulate around them. This prevents over-baking from the residual heat on the baking sheet and ensures every cookie is even in consistency. Plus, it helps avoid that sogginess you sometimes get if moisture gets trapped underneath.
If you're planning to store these chewy delights, correct storage is vital to keep that freshness locked in.
- Always let cookies cool completely before storing. Trapped heat in a sealed container is a recipe for disappointment.
- Use an airtight container. Moisture is the villain here, and you want to keep it away.
- For an extra pro tip, toss a piece of plain white bread into the container. It’ll help absorb any moisture, keeping your cookies delightfully chewy.
When it comes to freezing, that’s an option too. Just stack them with parchment paper between each cookie to avoid sticking and seal them in a freezer bag. They’ll last for about 3 months in there. Think of it as cookie insurance for those emergency sweet cravings.
Once you nail this cooling and storing routine, you'll have homemade cookies that stay irresistibly chewy for days. And let's face it, once word gets out, even Whiskers might keep an eye on the cookie jar!
Popular Posts

Macarons in Paris: What You Just Can’t Miss
May, 2 2025


Who Made the Best Tiramisu in the World?
Apr, 25 2025